
According to the best practices, flowgraphs have names with prefix FG_ and include runtime behavior and subject area:
FG_<RuntimeBehavior>_<SubjectArea>_<action>.hdbflowgraph
| Runtime Behavior | Suggested Naming Convention |
| Batch Task | BATCH |
| Procedure | PROC |
| Realtime Task | RT |
| Transactional Task | TRANS |
For example when our task is to extract test data from SAP to Oracle using a procedure our flowgraph would be named as follows:
FG_PROC_TEST_EXTRACTSAP_2_ORA.hdbflowgraph
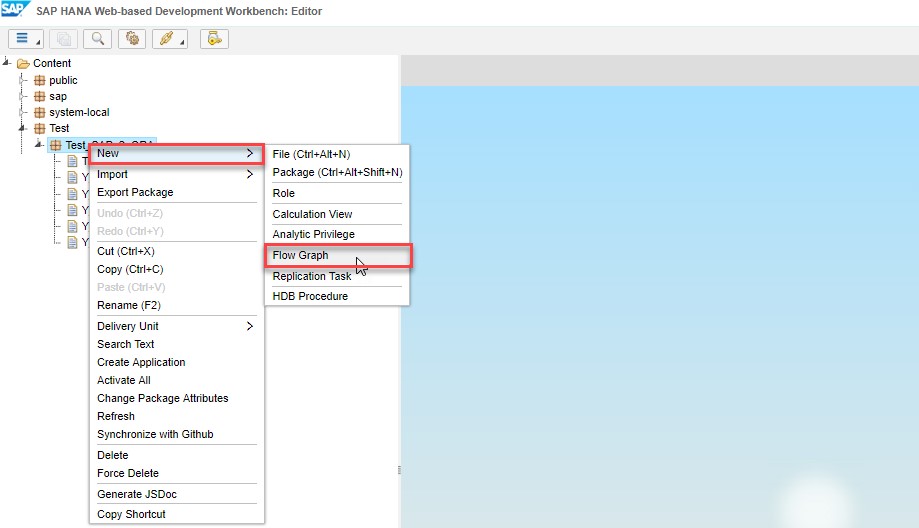
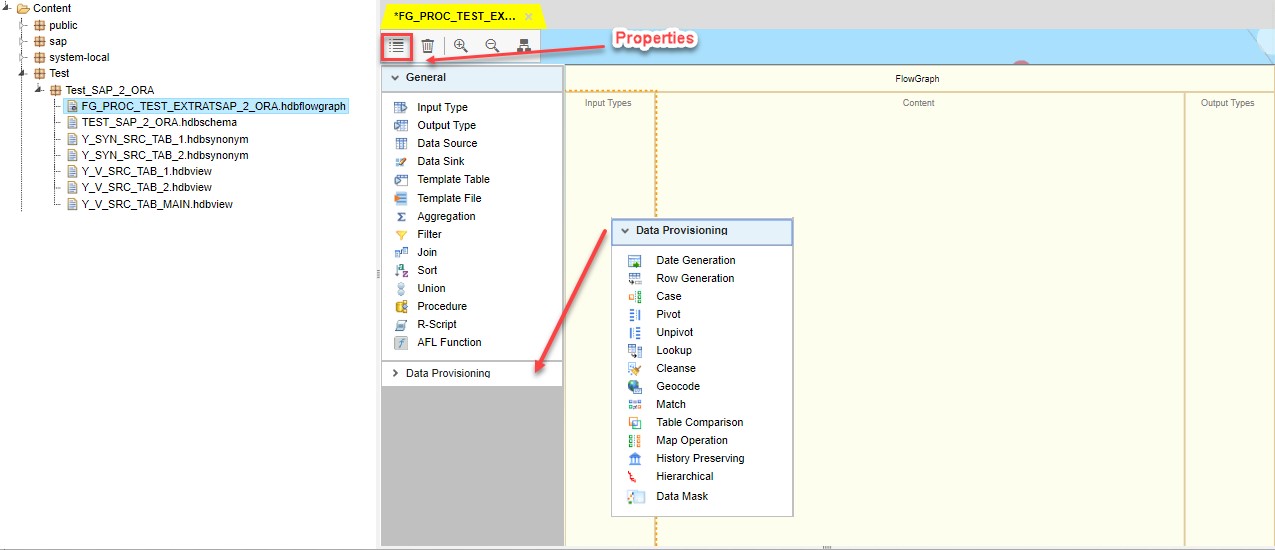
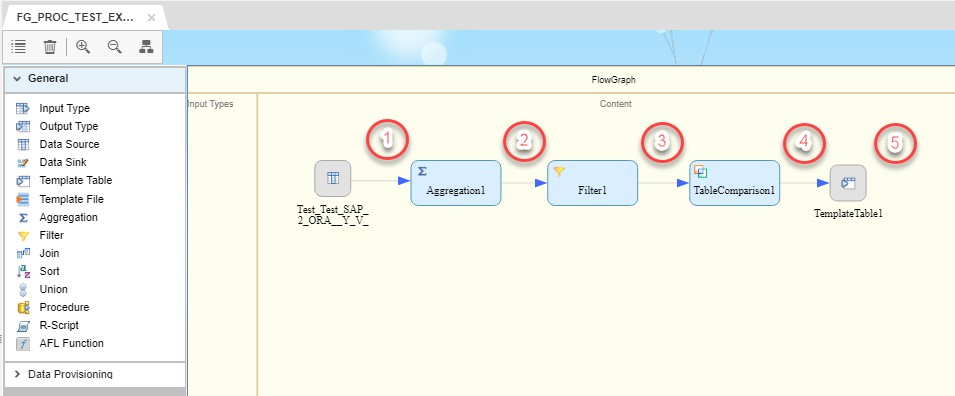
Development workbench provides a wide range of instruments to organise your data flow so that your target requirements are met:
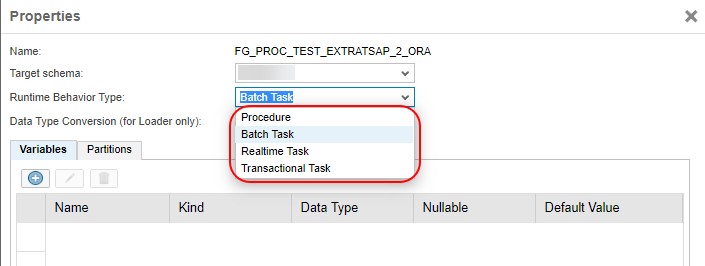
At first we fill in the flowgraph’s properties:
- Assign Target schema
- Select corresponding Runtime Behaviour Type
- Data Type Conversion (if needed)
- Create local variables
- Provide partitioning settings in case of big volumes of information are replicated.
It is rather difficult to cover all the available options in one post. We will use the most common ones for the demonstration of a flowgraph object.
Firstly, I put in the content area a Data Source. It will be the main hdbview, which was previously created.

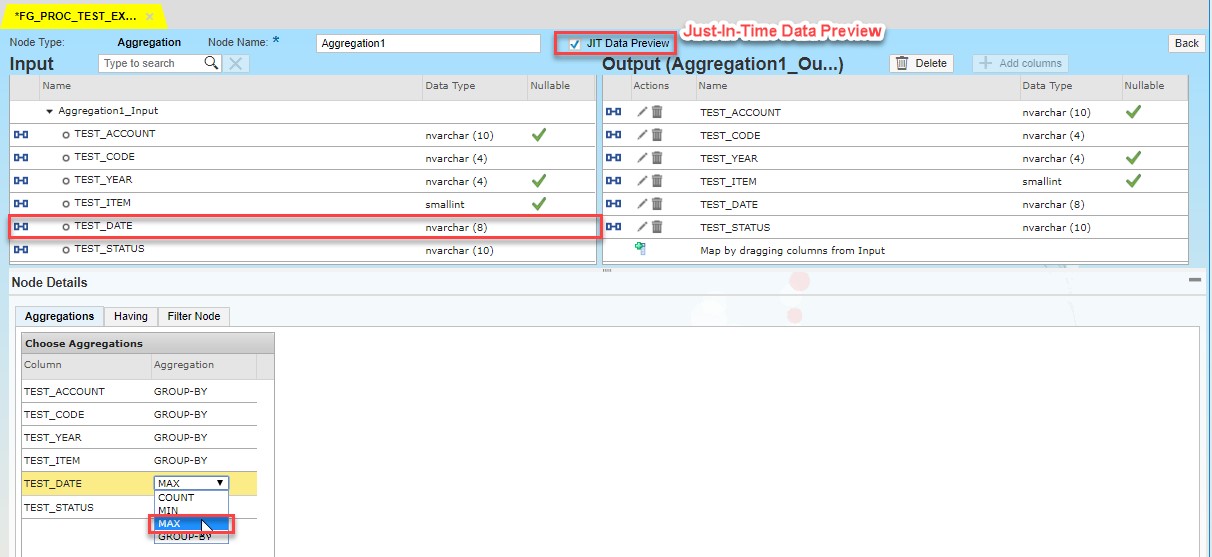
Then we will add Aggregation block and connect it with Data Source with an arrow:
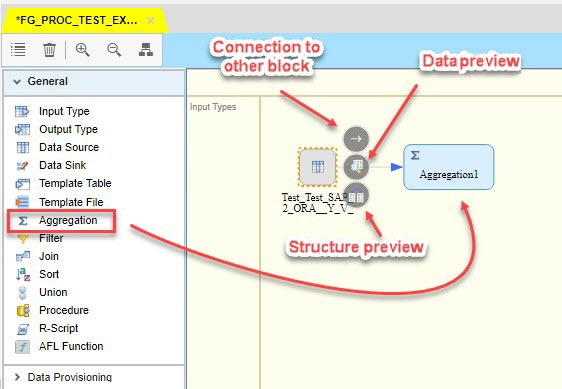
In this block we will aggregate entries with use of MAX function applied on a “test_date” field in order to exclude old data from the set. I would like to mention a very useful feature – JIT Preview, which allows us to check data set on each block where the feature is enabled. Having clause and filtering could be also provided in the aggregation.
The next block is Filter:
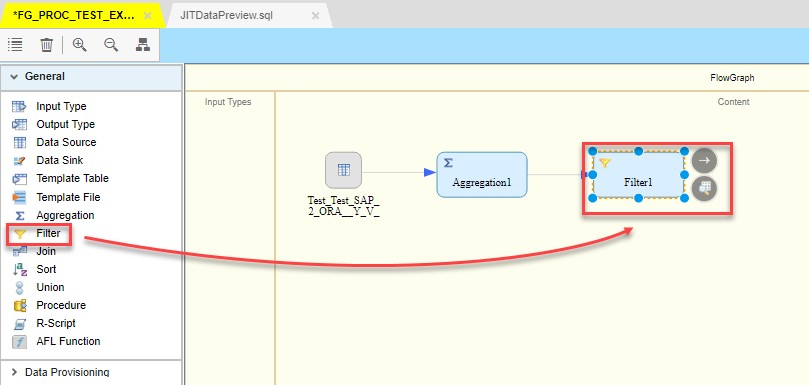
This block allows to put the fields in different order, create or remove fields from the source set. We need to create two additional fields for the view in this case. These fields are:
- CHANGE_TIME – Displays the time stamp of when the row was committed. All changes committed within the same transaction will have the same CHANGE_TIME;
- CHANGE_TYPE – Displays the type of row change in the source. The following values are available:
| I | INSERT |
| B | UPDATE (Before image) |
| U | UPDATE (After image) |
| D | DELETE |
| A | UPSERT |
| R | REPLACE |
| T | TRUNCATE |
| X | EXTERMINATE_ROW |
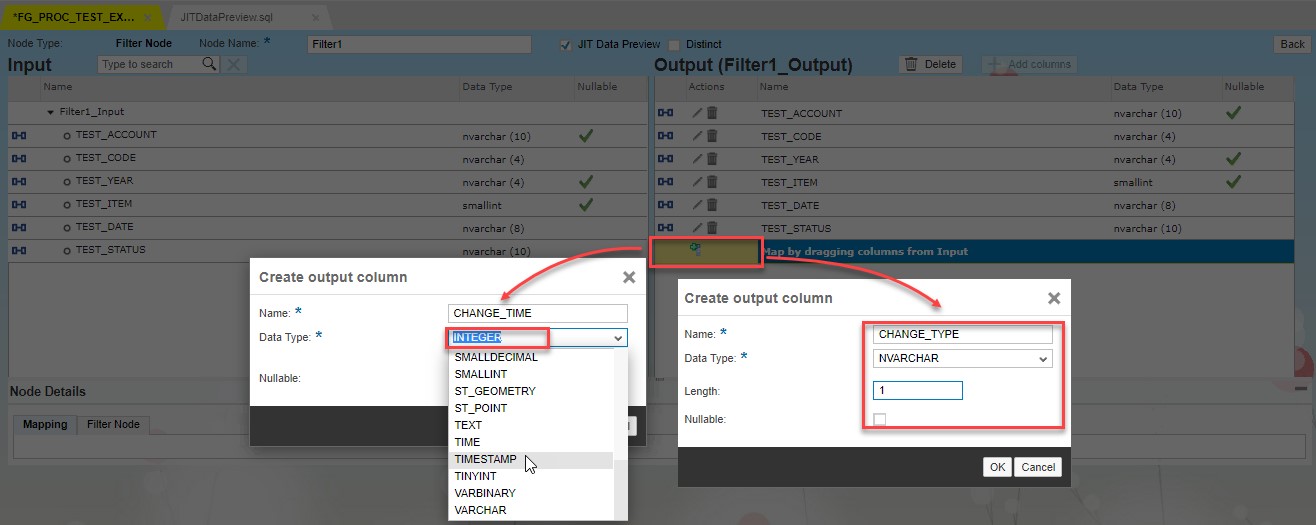
The value for CHANGE_TYPE in the mapping field should be ” ” and for CHANGE_TIME should be CURRENT_TIMESTAMP or CURRENT_UTCTIMESTAMP. You can also provide additional filtering statements here.
In order to check the correctness of the data that we move we use an element called Template table.

This block will play the role of target ORACLE table. It automatically creates the structure which was passed after Filter.
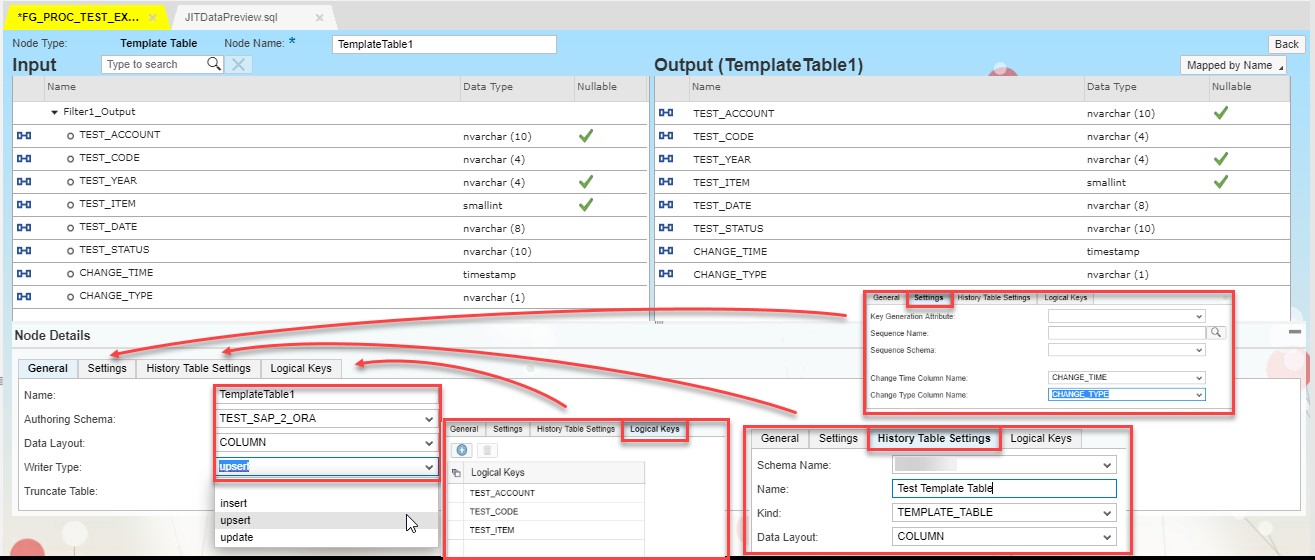
In Node Details we have to provide all necessary data. In General tab we should put:
- The name of the Template Table
- Authoring schema
- Data layout
- Writer type (In our case we will pick UPSERT)
- Checkbox Truncate Table allows to clear all data in the table before new entry.
Settings tab allows to set:
- Key Generation Attribute
- Sequence Name
- Sequence Schema
- Change Time Column Name
- Change Type Column Name
History Table Settings tab:
- Schema Name
- Name of the table
- Kind of the table (TEMPLATE_TABLE or DATABASE_TABLE)
- Data Layout (RAW or COLUMN)
In Logical Key tab by pressing “+” sign you can set key fields.
After saving the flowgraph the system generates in the Catalog new TemplateTable1 which we just put in the Content area.
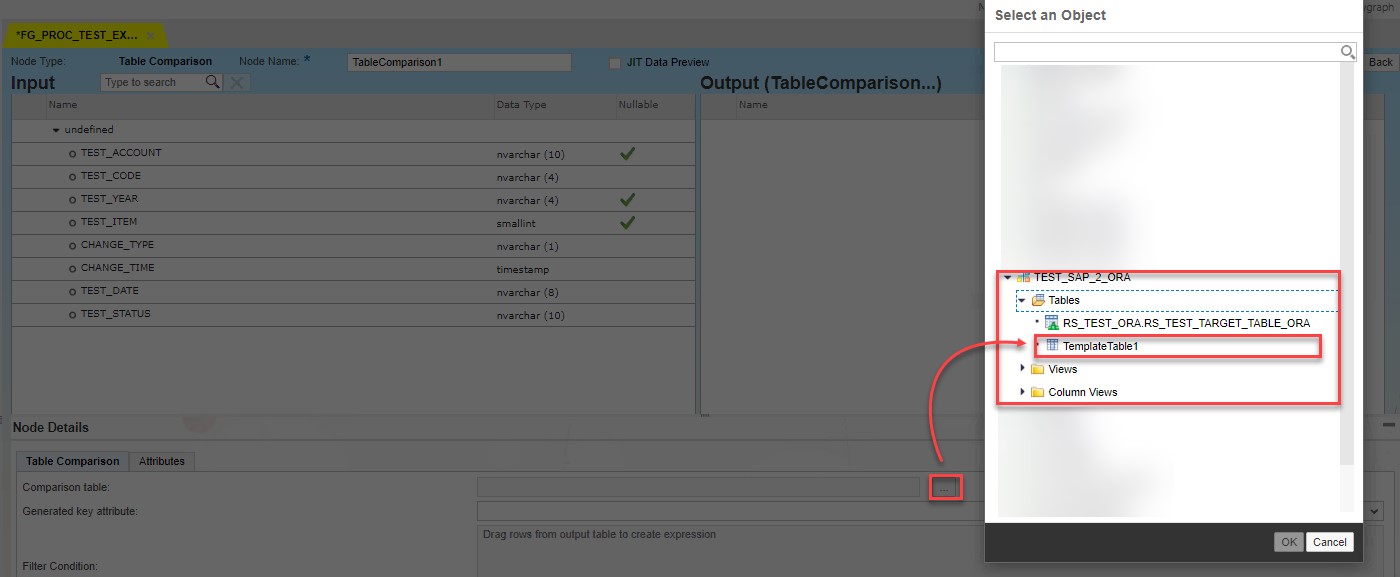
The following block is Table Comparison. It compares two tables and produces the difference between them as a dataset with rows flagged as INSERT, UPDATE, or DELETE. In my case it will compare data in target ORACLE table with source S/4 hdbview. This block will be put between Filters and Target Table.

Using Search Help corresponding table is selected.
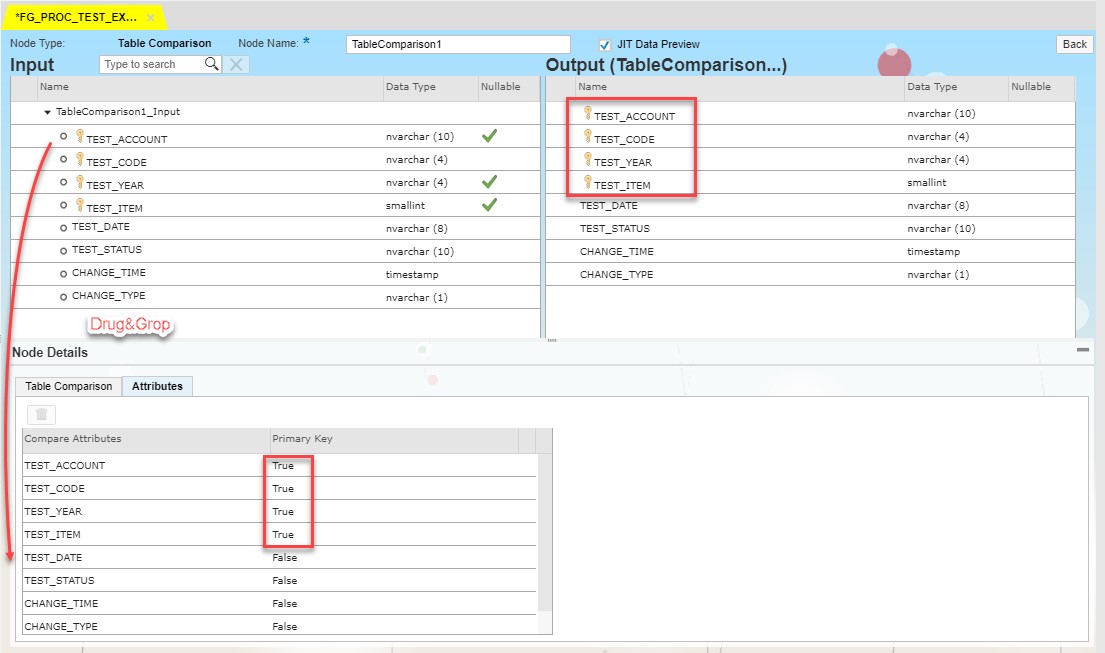
On the Attribute tab all the compared fields should be collected and Primary Keys should be assigned accordingly.
After all the steps Flowgraph should be saved. If everything is correct a corresponding message will appear in the Console. Then we Run the Flowgraph pressing ![]() button. In the console we see the following message:
button. In the console we see the following message:
![]()
Using JIT preview I will check the data flow after each of the blocks.
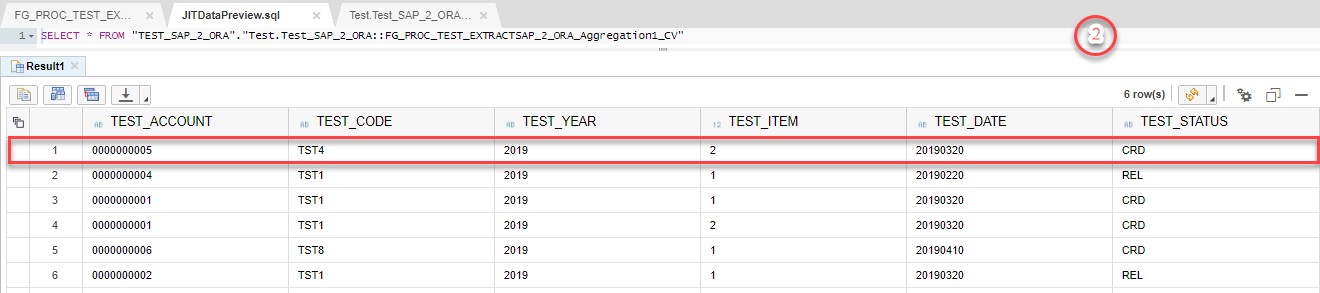
On the first step we have the following set of data:
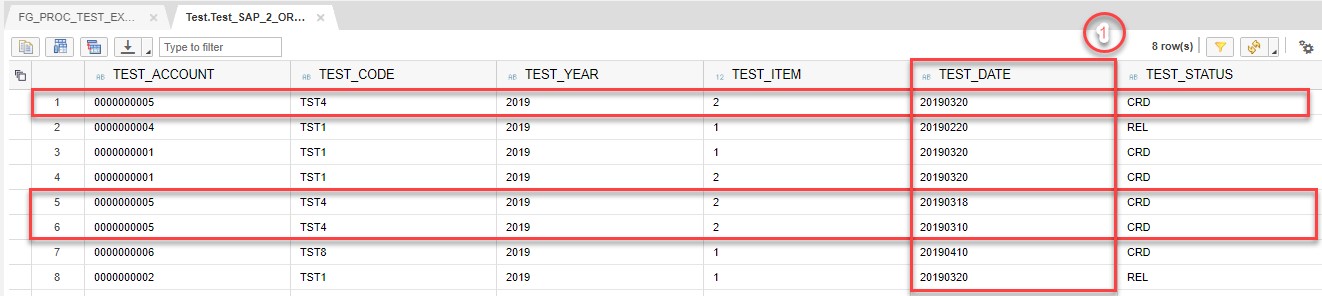
On the second step Aggregation block will leave entries only with MAX TEST_DATE.
On the third step Filter block will add 2 fields to the structure and populate with corresponding data.

Table Comparison block will compare data stored in Template Table and newly entered data set. System automatically creates additional field _OP_CODE and all the fields which are in the table structure with prefix _BEFORE in order to proceed with comparison.

On the last step we can see the new data set in the Template Table:

In case you’d have any questions about SDI please feel free to comment under the blog.
